• Create an event.
• Create the workflow and ensure that the start node is an event of type Receive.
• Provide the event name in the event filter.
• Now, create a database trigger and raise the event in it.
• Pass parameters instead of event data while raising the event.
• In the workflow builder, drag and drop the attributes under the event, which
will hold the values of the parameters passed while raising the event.
• Now, go to the process window, double click and open the Node attributes tab
of event properties. The list of the entire attribute is shown along with
their values.
• Now, the values are passed inside the workflow process and can be used for
further transactions.
Let’s see that in detail
Create an Event:

Specify the name, Display name, Owner Name and Owner tag for an Event. Ensure that Owner Name and Tag are in CAPITALS.

Now, click on Subscriptions link on the top left hand corner.

Now, go to workflow and create the workflow that will receive the event when it is raised.

Create the required attributes.

Now, create an event which will capture the event raised.

P.S: Event Action is ‘Receive’. Event filter is the name of the calling event. It is case sensitive, hence type the exact name of the event in the event filter field matching the case.
Now, drag and drop the attributes from the Attribute node to the Event node.

Now, create a message to check for the values passed when the event is raised.

Now, drag and drop the attributes from the Attribute tree to the message tree.

Create a notification and add the message to this notification.

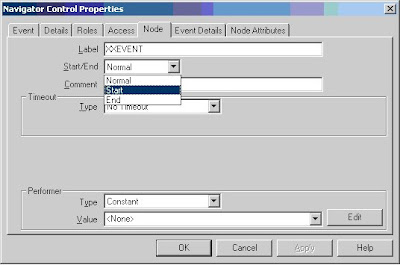
Once done, Open the Process window and delete the Start Node from the Process window.

Right click on the process window and click on New Event.

Add the already created event in the process.

Check the Node attributes and will have the attributes listed in it.

Change the Node from ‘Normal’ to ‘Start’

The modified, process window looks as shown below.

Add the created notification in the process window. Modified process window looks as shown below.

Change the performer to ‘OPERATIONS’ (must be in capitals) or ‘SYSADMIN’ or any other preferred username.

Create transitions between the three nodes.

Save the workflow in the database. Verify it using the file menu.

Once verified, click on the ‘OK’ button.

Now, get back to the Oracle Applications web page and login as ‘SYSADMIN’. Open the subscriptions page of the event which was created earlier and then click on the ‘Create Subscription’ button.

Fill the details as shown.

Ensure that Phase is set to 99. Click ‘Next’.
Then specify the Internal name of the Workflow to be fired and also specify the internal name of the process to be fired from the specified workflow.

Owner name and tag are ‘SYSADMIN’.
Click APPLY. A message appears as shown below:

The next step is to write a procedure or a database trigger which will raise this event on either update or insert. So open TOAD and copy and paste the scripts given below.
CREATE TABLE xxchk_event(num number, data varchar2(20));
/
CREATE SEQUENCE event_key_s
start with 1
increment by 1
nomaxvalue
nocycle
nocache;
CREATE OR REPLACE TRIGGER xxaftinsert
AFTER INSERT OR UPDATE
ON xxchk_event
FOR EACH ROW
DECLARE
l_parameter_list wf_parameter_list_t;
l_event_key NUMBER;
BEGIN
l_parameter_list := wf_parameter_list_t (
wf_parameter_t ('XXAT1', :NEW.num),
wf_parameter_t ('XXAT2', :NEW.DATA)
);
SELECT event_key_s.NEXTVAL
INTO l_event_key
FROM DUAL;
wf_event.RAISE (
p_event_name => 'xx.test.event01',
p_event_key => TO_CHAR (l_event_key),
p_parameters => l_parameter_list
);
END;
/
INSERT INTO xxchk_event
VALUES (3, 'Kumar');
/
BEGIN
wf_engine.background ('XXEVENT');
END;
/
Once the data is updated, login to APPS, go to sysadmin, workflow administrators web service responsibility and then select Notification.
The Notification window looks as shown below.

The updated data is shown in the Notification.

The data in the table is as below:

So this is how we pass a value from Oracle Base tables to Workflow.


No comments:
Post a Comment